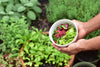
From Seedling Pot To Garden.
You’re getting ready to plant out those seedlings you started from tiny seeds. It was cold, maybe snowing, when you planted those seeds, but you had faith spring would come again. You’ve been tending them, turning them, so they don’t lean one way, watered just enough, and – well – they’ve become your babies, and getting too big for their indoor pots. Now it’s time to let them experience the big world of your garden. The process of transplanting seedlings from seed starting tray or pot to garden – with less stress on you and the plant, has 5 steps. Let’s take them one at a time.
1 - Hardening Off Before Transplanting Seedlings
Whether you started your own seeds indoors or you’re buying plants from a local nursery, they’ve spent most of their time indoors under artificial lighting. Seedlings are fragile and need to get accustomed to the outdoors in short periods. This is called hardening. Nurseries assume you are going to buy and plant the same day, so they do this step for you.

The hardening off process is critical if you have started your own seeds. Your seedlings haven’t experienced wind, rain, or full sun, so they have to experience them in short bursts of time in order to not get overwhelmed. You’ll be moving your plants in and out, always dependent on your weather.
Start on a cloudy day when it’s warm with almost no wind, maybe a gentle breeze. To the fragile plant stems, a windy day is like a tornado, and they cannot handle that. Find a protected corner where your plants will not get any direct sunlight and let them experience the great outdoors for a few hours.
Be sure to bring your plants in every night because the nighttime low temperature is going to play a critical role in the productivity of your plants.
Increase the length of exposure everyday, and for vegetables and sun-loving flowers or herbs, slowly start moving them into direct sun, a bit at a time. A shade-loving plant will have to get its stem toughened up, but it is best not to set it in the sun during the hardening off process.
2 - Garden Preparation While Hardening Off Seedlings
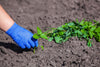
If you have a vegetable garden or are planting some annual flowers in with your perennials, you will need to make that spot ready for your seedlings. The only tools you’ll need are a hand trowel and a watering can.
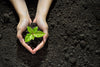
You want to disturb the soil as little as possible because there’s a whole community of microorganisms underground waiting to help your plant through the stress of transplanting all the way through to fruit and flower production.
Dig a trowel of soil where you plan on planting and look at the soil: is it dry, is it sandy, is it clay, does it have some earthworms, is it dark brown or light brown color? You will have the best transplanting success if you make these observations first. You spent all that time getting your seedlings ready for this part of their journey, you want to give them just as much care in the garden. The condition of the soil is crucial to successful seedling transplanting.
Take into account everything you’ve observed. Make a mental note, or better, keep a garden journal, for each hole you’ll dig for your plants. You’ll want to be sure you’ve mapped out where every plant is going. Use a measuring tape so you plant far enough apart, mark the spot with a stick or something readily available so you’ll be organized when it’s time to transplant your seedlings. It will look like there is way too much space between markers, but you’ve been giving your plants the best care, and they will grow into that space in a very short time. Be sure to water the garden space you’ve prepared with a mix of water and a soil amendment containing humic acid a few days before transplant day.
That allows the soil amendment time to soak into the soil and start strengthening the microbial community your plant will need during those first few days in the great outdoors.
Kaytonik™, is an organic soil amendment that will help your seedlings withstand adverse weather, increase the fertility of the soil, and strengthen your plants' roots.
3 - Make Sure Everything’s Ready To Transplant Your Seedlings
Check the soil in the pots. Make sure it’s damp so it will stick to the roots of your young plants. The tiny root hairs are susceptible to damage at this stage and watering each pot with a water/soil amendment mix gives them a leg up.
The best day for setting out, or transplanting your seedlings is going to be gloomy and overcast. This gives your seedlings a chance to get used to their new home and not wilt in the intense sun - a stressor your plants don’t need when they’re getting established.
Find out when the average first and last frost dates are for your location. The Old Farmers Almanac has a nifty frost date calculator. Remember, those are averages, check the weather for the next week or so. If it’s going to freeze in a couple of days, you should wait because all but the hardiest of plants will die from frost. Tender annuals like tomatoes and peppers like evenings to be in the 50s (F) for optimum growth. A cold night in the 40s (F) will set them back and they will never reach their full potential.
If you’ve gotten overanxious and already set out your seedlings and you do see a cold night coming, pull out the Reemay or some sheer curtains to cover your plants. Be sure and set some stakes or PVC piping for the cloth to go over, it should never touch the plants. If the plants touch the Reemay or sheers, the leaves that touch the cloth will feel the cold temperature and send that information back to the rest of the plant.
You’re creating a mini greenhouse so hold the edges down with boards, rocks, or whatever you have so the wind won’t blow the Reemay or curtains away. You’ve spent a lot of effort getting your seedlings to this stage – play it safe and cover your plants. You can use Reemay cloth instead of plastic for any of these frost shelters. This video gives 5 low-cost greenhouse ideas, one of which may be perfect for you.
4 - The Day Has Come To Transplant Your Seedlings
You’ve prepared the soil, you’ve hardened off your seedlings, you’ve checked the weather forecast, it’s almost drizzly outside. The perfect day to transplant your seedlings.
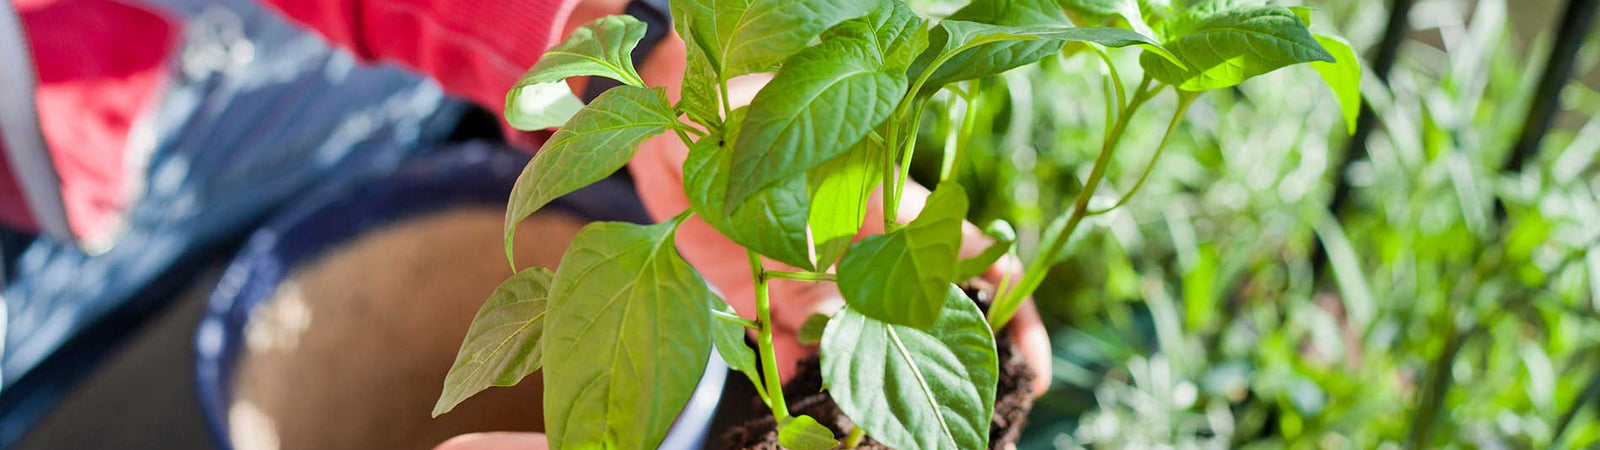
By now, your seedlings are spending all their time outside. You have only brought them in at night if the temperature is dipping below 500F (single digits C). Their stems should look much different than before you started hardening them off. At the beginning of the process the stems were fragile and thin, now they should look strong and hardy.
Place each seedling by the marker and dig a hole a bit larger than the pot with your seedling, if you haven’t done so already. Be sure the soil in all the pots is damp so it will stick to the roots of your plant. You want as much of that soil to stay on your roots as possible to avoid transplant shock.
Water in each plant as you go with a mixture of Kaytonik™ and water. The less stress, the more successful the transplanting.
Turn the pot upside down with the plant stem between your fingers and your hand over the top of the soil. Tap the bottom of the pot, or squeeze it on a couple sides, or use a stick or pen and push through the bottom water hole to loosen the soil and plant in the pot. The entire pot should come out into your hand, soil and plant in one piece.
This is when you need to remember these are babies and need gentle handling. Hold the plant upside down until you are exactly over the hole you’ve dug. Eyeball the hole to make sure it’s deep and wide enough. When you’re sure it’s the proper size, turn your hand over, holding the plant and soil in place and put into the hole. Now fill in the hole with the soil you previously dug out.
You’ll always have soil left over from the hole because you’ve replaced it with the soil in the pot. Use that soil to make a dike, or rim, around your newly transplanted seedling. Water your seedling in and the dike will hold the water so your plant gets full benefit, instead of running off into the bed.
Move on and repeat until all your plants are planted and watered in.
5 - The Day After Transplanting Seedlings – Check-up Day
Check-up day is important to catch any problems before they become disasters. How are your plants doing? They may look a bit wilty for a day or two, its stressful moving – just like it is for us.
Are any looking a bit worse than others? This is when you find out how valuable having a garden journal can be. Get yours out and read what the soil was like in that spot in the first place. Maybe you have a plant in a hole that was extremely dry and sandy.
Do some observation by digging a hole close to, but not where the seedling is, and examine the soil. If it was dry and this trowel of soil is still dry then this seedling needs some more water. Even though you built the dike for above ground water retention, there should be dampness in the surrounding area.
What if the surrounding soil is damp, and the hole was dark brown with earthworms in the first place? Was this plant as vigorous as others before transplanting? Was it a bit leggy, or did it have root mass that was circling the pot?
Plants are just as complex as human beings. They have so many specific needs, and there are so many factors that go into plant health. All you can do is be kind to that plant and it may perk up. Just as you didn’t get 100% germination from your seeds, you may not get 100% success with your seedling transplanting.
Make note of all the factors you can and remember, there is always next year. Also look around you at all the plants that are looking great. You are going to be enjoying nutritious food and beautiful flowers all season long. Talking about flowers, check out this blog to learn about some toxic plants that may be in your garden.